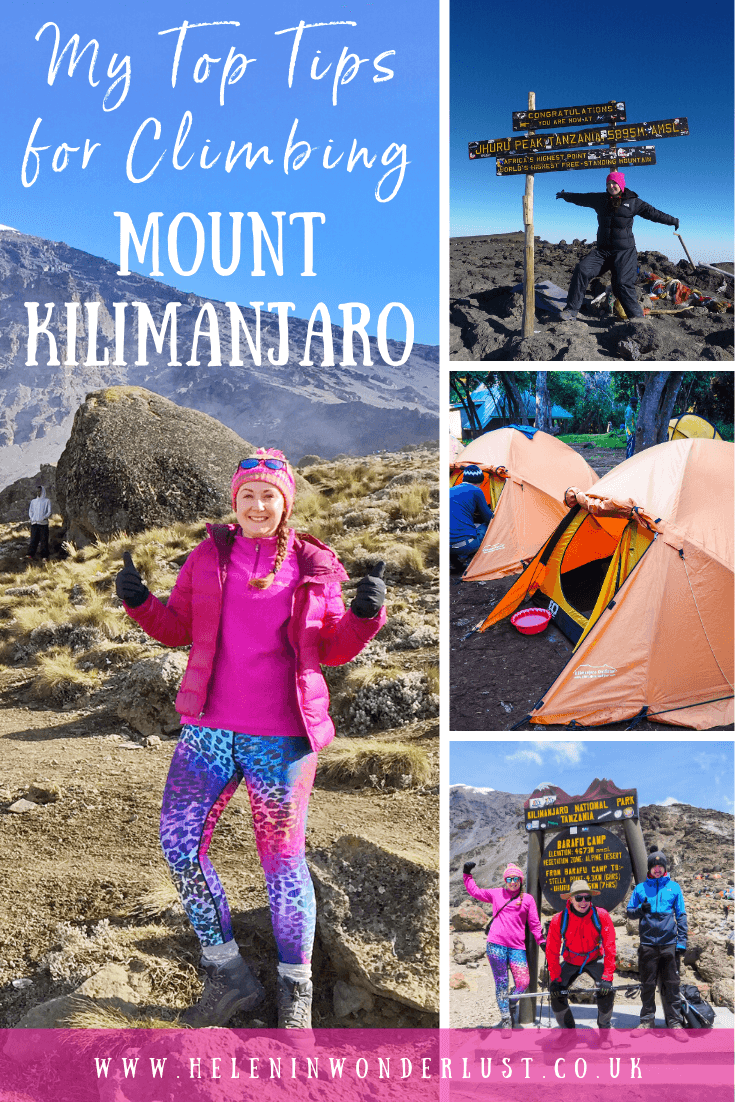
Climbing Kilimanjaro: How to Prepare & My Tips for Reaching the Top
 Climbing Mount Kilimanjaro was one of the reasons I wanted to travel to Africa in the first place.
I’ve since climbed Kili twice, but before I climbed Kili the first time, I knew very little about it and had never climbed a big mountain before, so the thought of it was completely overwhelming.
Kilimanjaro isn’t the highest mountain, but it is difficult and the success rates are relatively low.
This is usually down to lack of preparation and the effects of altitude sickness. However, there are a lot of things you can do to ensure you have a successful climb!
So, based on my experiences, here’s everything you need to know to start preparing for your own Kilimanjaro trek.
If there’s anything that I haven’t covered, leave your questions in the comments below and I’ll answer them or point you in the right direction!
Reaching the top was one of the most incredible moments of my life (both times) and with my preparation tips, I hope it will be one of yours too!
Climbing Mount Kilimanjaro was one of the reasons I wanted to travel to Africa in the first place.
I’ve since climbed Kili twice, but before I climbed Kili the first time, I knew very little about it and had never climbed a big mountain before, so the thought of it was completely overwhelming.
Kilimanjaro isn’t the highest mountain, but it is difficult and the success rates are relatively low.
This is usually down to lack of preparation and the effects of altitude sickness. However, there are a lot of things you can do to ensure you have a successful climb!
So, based on my experiences, here’s everything you need to know to start preparing for your own Kilimanjaro trek.
If there’s anything that I haven’t covered, leave your questions in the comments below and I’ll answer them or point you in the right direction!
Reaching the top was one of the most incredible moments of my life (both times) and with my preparation tips, I hope it will be one of yours too!
Other Kilimanjaro & Tanzania posts you might enjoy…
- Tipping on Kilimanjaro: Everything You Need to Know
- The Ultimate Kilimanjaro Packing List – Clothing, Shoes & Equipment
- My Experience Climbing Kilimanjaro – Part 1
- My Experience Climbing Kilimanjaro – Part 2
- 24 Awesome Things To Do in Moshi, Tanzania
- An Awesome Tanzania Itinerary (Plus Map, Tips & Things To Do)
- The Best Hostels, Guesthouses & Campsites in Tanzania
- How to Find a Serengeti & Ngorongoro Crater Safari (to suit your budget)
- How to Get Around Tanzania By Public Transport
- The Perfect 2-Week Kenya & Tanzania Itinerary
- The Most Useful English to Swahili Words & Phrases for Travel in East Africa
- How to Get Your Tanzania Visa & Entry Requirements
- How Much Does it Cost to Travel in Tanzania? How to Budget for Your Trip
My Top Tips for Climbing Mount Kilimanjaro
Before You Go To Tanzania
1. Train for Your Trek
Some people are natural hikers and some people aren’t. To maximise your chances of reaching the top, make sure you do a bit of training before you go. Even if it’s just walking around your home town with your bag (and make sure you weight it remember you’ll be carrying at least 3 litres of water, plus snacks, clothing, camera, etc. in your bag each day). You won’t realise how much even a relatively light daypack can start to make you ache until you’ve worn it for a few days, so build up your back, shoulder, core, and leg muscles.2. Visit Your Doctor
Before you take on a strenuous trek like Kili, it’s always a good idea to visit your doctor for a check-up. Whilst you’re there you’ll also be able to ask about malaria tablets and Diamox (the drug that helps combat altitude sickness).3. Wear in Your Boots
Building on the first point, one of the most important things you can do to prepare for Kili is to wear in your hiking boots. Blisters are the bane of your life on Kilimanjaro, so try to avoid them at all costs. Even if you’ve had them for a while, it’s quite different wearing boots for a couple of hours on a hike to wearing them almost constantly for a week. You can do this by going for practice treks and wearing your boots as often as you can, even if it’s just around the house, or to go to the shops to stretch the boots and toughen up your pressure points.4. Choose Your Trek & Trekking Company Carefully
You cannot climb Kilimanjaro without a licensed guide, so you will need to book your trek through a registered company. Along with guides, you will also have porters and a chef. Historically, some of the workers on Kilimanjaro (porters especially) weren’t (and some still aren’t) always paid very well and had (and still have) to work under terrible conditions, especially considering the backbreaking (and potentially dangerous) work they do. Without the porters, most people would not be able to climb Kilimanjaro. They carry all your equipment, food, and clothing up the mountain, so all you have to carry is your daypack. As a result, KPAP was founded. KPAP, stands for the Kilimanjaro Porters Assistance Project, a not-for-profit organisation that regulates standards for workers on Kilimanjaro. KPAP ensure that the porters:- are paid at least 20,000 TSH per day (approx. $9 per day).
- receive their salaries within 2 days of completing the climb.
- eat 3 meals per day on the mountain.
- have sufficient equipment and clothing on the mountain.
- are cared for when injured or sick.
- carry 20kg of weight or less.
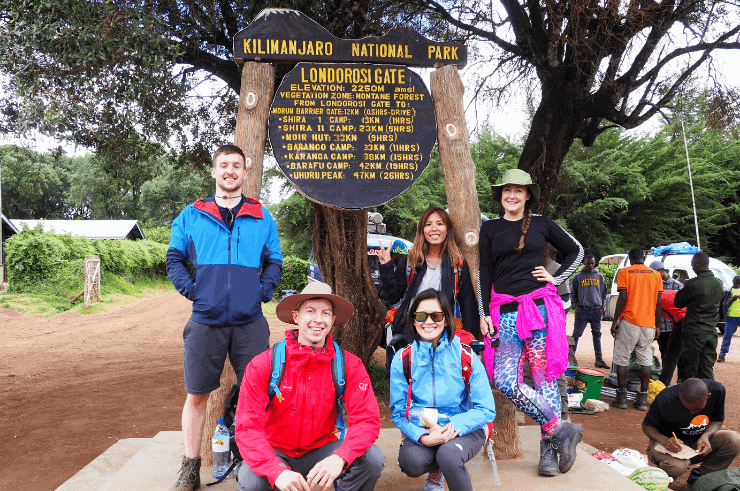
5. Choose Your Route Carefully
Whilst climbing Kili in the fastest time possible might seem like a good idea, taking longer to climb will help your chances of success. There are seven established routes to climb Mount Kilimanjaro – Marangu, Machame, Lemosho, Shira, Rongai, Northern Circuit, and Umbwe. There is another called the Western Breach – but it’s notoriously more dangerous than the other routes, and many tour operators don’t use it.- Marangu: Known as the “Coca-Cola” route, the Marangu route is known as the easiest due to the gradual slope. However, it has one of the lowest success rates, probably because people choose to do it over 5 days. This is the only route with huts you can stay in.
- Machame: This is known as the “Whiskey” route, difficult and busy, but one of the most scenic routes! This is the route I took the first time! You can read about my trip here.
- Lemosho: Similar to the Machame Route, using some of the same paths, so also very scenic but with less traffic. Can also do this over 8 or 9 days which helps for acclimatisation.
- Rongai: An easier route than Machame, Lemosho, and Shira, but less crowded than the Machame Route.
- Northern Circuit: This is the newest Kili route and the longest so it now has one of the highest success rates. It’s great for the scenery too. Furthest drive from Moshi.
- Umbwe: A very direct route that is known to be extremely challenging. This is not for the faint-hearted and should only be attempted by climbers who are confident that their body responds well to altitude.
6. Join a Group
If you don’t want to trek alone, then find a group to join. For me, trekking in a group was so much better than doing it alone. But that’s just me, you might want to trek by yourself. There are plenty of group treks available, so reach out to various operators and ask when they have open treks you can join.
7. Get Your Travel Insurance
This is Africa and medical care is not free. If you get injured or fall sick, you will have to pay for your medical care which could be very expensive, so make sure you have comprehensive travel insurance that will cover you for all aspects of your trip. I recommend World Nomads, Outbacker, or InsureandGo.8. What to Pack
Your trekking company should give you a packing list or you can use mine below. Please don’t overpack as believe me, you will regret it later. I know this from experience from my first trek. You also don’t need to buy everything new if you don’t have it already. You can borrow items from friends and most trekking companies have a big stock of things to hire and will send you out a list of what’s available. The only thing I would never borrow is hiking boots, but you can hire them too. READ MORE: The Ultimate Kilimanjaro Packing List9. Staying Motivated on the Mountain
Trekking for hours and hours at a time can be arduous and you’ll want to try and keep as motivated as possible, both on the trek and whilst resting in camp. Here are some of the ways I prepared for this:- Pack of Cards: Take some a pack of playing cards. We had hours of fun playing Shithead and Sevens just make sure you learn the rules before you go as there isn’t always signal on the mountain.
- Messages from Friends: When a friend of mine climbed Kili, I gave her little motivational letters to read at the end of each day. She said it really helped her. This was a few years ago though and nowadays you could get your friends and family to send you short videos that you can watch when you need them.
- Playlist: Make a soundtrack for your trek and fill it will your favourite motivational music. If you wanna put Eye of the Tiger or Gonna Fly Now (the other Rocky theme tune) go for it!
- Podcasts & Audiobooks: Download your favourites and listen to them as you walk or in your tent at night.
- Chargers: Just make sure you have a way to charge your electronics (spare batteries, power pack, solar charger etc.).
- Kindle: You can also take an E-Reader if you have one.
In Tanzania, Pre-Trek Prep
10. Arrive a Few Days Early
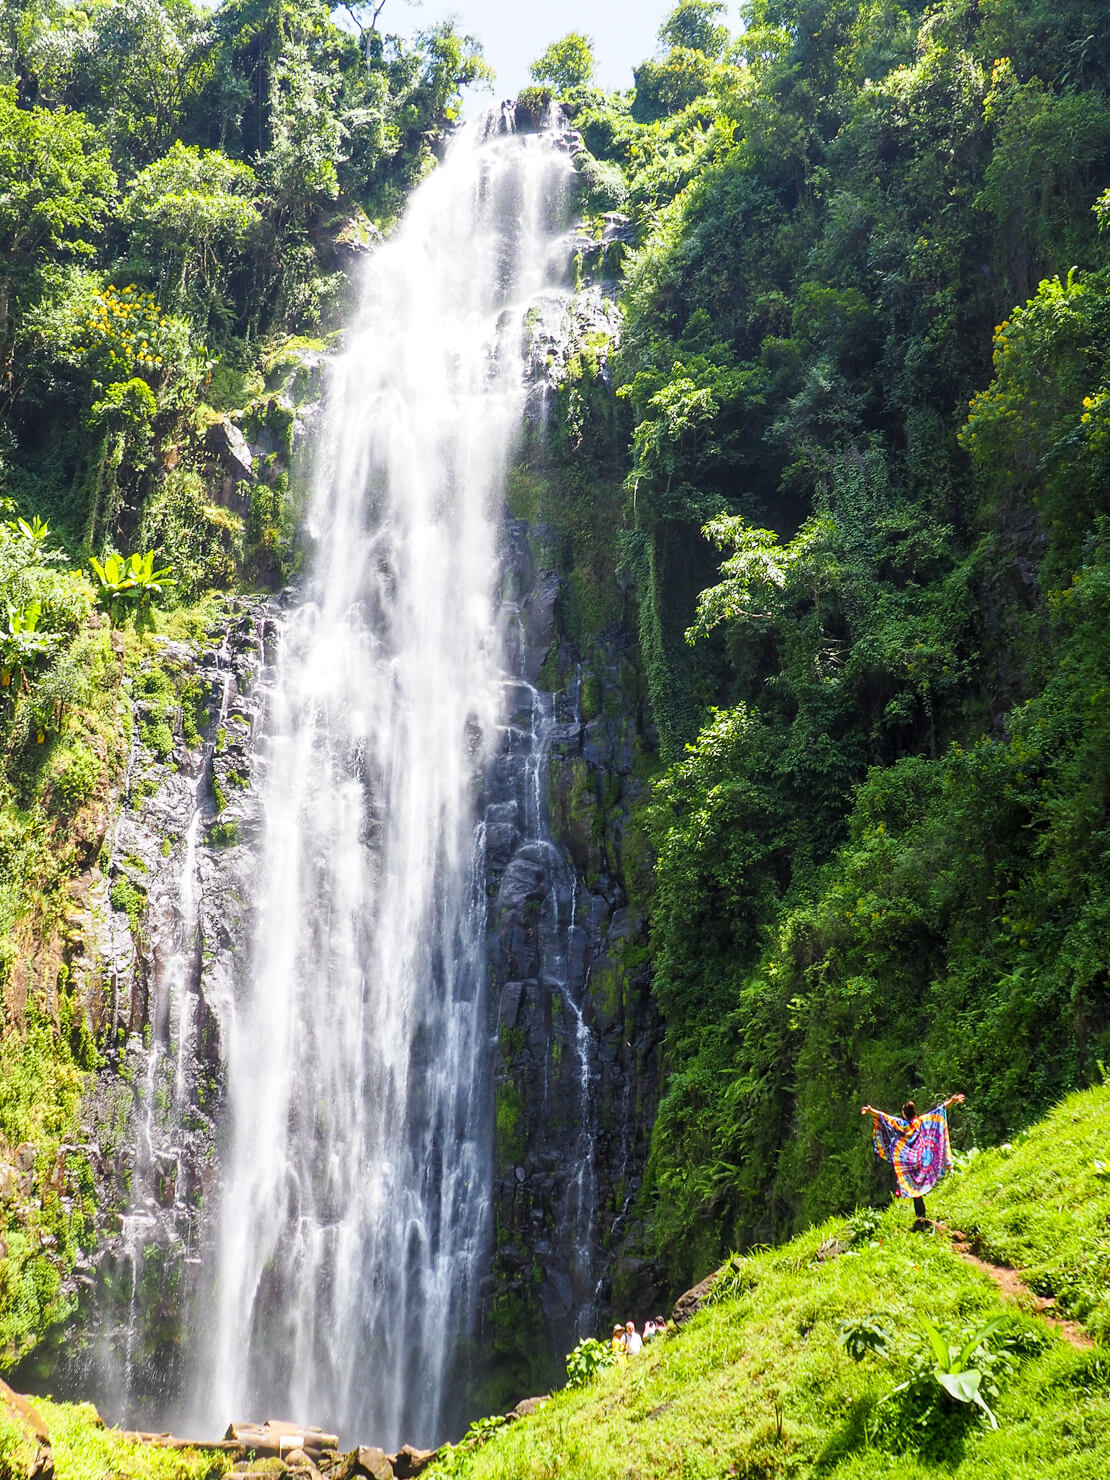
I would give yourself at least a day or two to recover from your flight, get organised, acclimatise and mentally prepare yourself for your trek, especially if you are coming from a very different time zone. You can also do some basic admin like getting a local SIM card and changing money. You could even take an acclimatisation trek to the beautiful Materuni Waterfall.11. Where to Stay in Moshi
Some treks include accommodation pre or post-Kilimanjaro but if they don’t here are some good options:- Budget: The Secret Garden or More Than a Drop
- Mid-range: Chanya Lodge
- High-end: Kilimanjaro Wonders Hotel or Ameg Lodge
12. Prepare Yourself Mentally
Climbing Kilimanjaro is no picnic. But it’s also a lot of fun. Spend the days and weeks before the trek getting yourself prepared for the trek. I am a big believer in ‘Positive Mental Attitude’. I visualised myself at the top before both treks and stayed positive throughout the experience. Even when I was hurting, I just focused on the goal. I also encouraged everyone else, including people I didn’t know. Not in an annoying ‘cheerleader’ way, but more of a ‘you got this’ kind of way – especially to my group and others who were trekking alone. Some people need this, and some can manifest it by themself. It also helps you to subconsciously motivate and support yourself – like an affirmation.13. Stock Up on Snacks
You can either bring some of your favourite snacks from home or if you haven’t already, you can go to the supermarket in Moshi. I’d definitely recommend bringing things like protein bars, cereal bars, nuts, and chocolate. Kendal Mint Cake is my favourite trekking snack. It’s basically pure sugar but the mint flavour really helps to make you feel refreshed and also helps with sickness. The guides and porters loved it too. You might also want to take some ginger/peppermint tea or ginger-based snacks (such as crystallized ginger) as these will help keep your stomach feeling good. Last time I went, I even took a couple of small bottles of Coca Cola as I knew I’d be craving it on the mountain (but don’t take much as they’re heavy).14. Meet Your Guides & Hire What You Need
Usually the night before your trek, your guides will come to your hotel to brief you and do an equipment check. They will usually make a note of anything you don’t have and the following morning, prior to starting the trek, you will be able to hire what you need. I would highly recommend you hire walking poles. They are a Godsend, especially on the way down and if you have bad knees like me.15. Pack & Rest Up
Pack your bags the night before you trek (don’t leave it until the morning) and take out anything that shouldn’t be there. You can usually leave a bag at your hotel. You won’t need laptops, jeans or shampoo, etc. so leave all non-essentials behind. Make sure you go to bed early and make the most of your nice hotel room and comfy bed because you ain’t gettin’ another one for a while. And really enjoy that last shower and eat a big breakfast!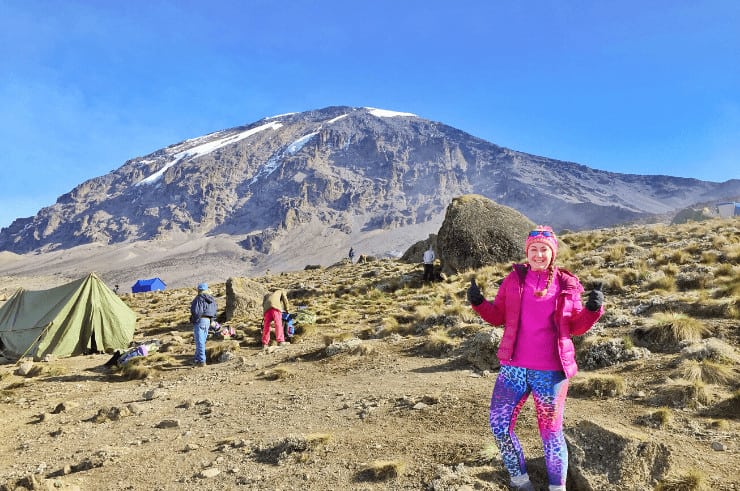
During Your Kilimanjaro Trek
16. Go “Pole Pole”
Whilst it’s tempting to race to the top, don’t. Go at a slow, steady pace. Or as you’d say in Swahili, “pole pole”. The slower you go, the better your body will be able to adjust to the change in altitude.17. Drink Lots of Water
Drink as much water as you can. You’ll sweat a lot, so this will help keep you hydrated which will also help with acclimatisation. You should be drinking at least 3 litres on the trek and more at camp. It’s worth investing in a Camelbak (or there are cheaper bladder packs) too. These are great because they go inside your daypack and you drink from a tube, meaning you don’t have to keep taking it out of your bag all the time. You may also want to add electrolytes to your water too, to ensure you stay hydrated. You may also want to get an insulated tube to stop your water freezing in the tube on summit night and don’t forget to blow the water back down inside the bladder. I had a 2-litre Camelback and a 1.5 Nalgene water bottle which I would carry in my daypack. Nalgene bottles with wide necks are good as the water doesn’t freeze as easily.18. Look After Your Feet
Do whatever you can to look after your feet. You need them in good condition to get you up that mountain. If you get blisters, you will be absolutely miserable. Do this by:- Wearing in your boots.
- Washing your feet each evening.
- Wearing clean socks each day if you can, or at least dry ones.
- Cut your toenails before the trek and perhaps again before summit night (this will help, especially on the way down when your feet are pushing into your boots).
- Wear blister plasters from the start.
- Bring comfy, closed-toe shoes to wear around the campsite. I used my Nike trainers. Whatever is comfy for you.
19. Wash Your Feet
Each morning and evening in camp, your porters will bring you a bowl of warm water with soap to wash with. I would usually have a bit of a body wash in the mornings, literally just armpits and intimate area, so you may want to bring a small flannel that you can keep in a ziplock bag. Then in the evenings, I’d wash my face, scrub my nails (with a nailbrush) and most importantly – wash my feet. You will feel so much better and it will help to keep your feet in good condition for the duration of the trek.20. Keep a Positive Mental Attitude
The mental of Kilimanjaro is more mental than it is physical so you need to try and keep yourself motivated. Do whatever it takes. Be confident that you will reach the top. Do not let self-doubt creep into your mind. You can do this! Listen to your motivational podcasts, audiobooks or music. If you’re more spiritual, repeat affirmations, meditate and visualise yourself at the top of that mountain. Believe me, it feels incredible! And you will look and feel amazing and strong after the trek.21. Take Diamox if You Need To
The first time I climbed Kilimanjaro, I took Diamox for the first couple of days, but stopped when I got ill. I assumed it was my body reacting to the drug. Diamox is really good for treating altitude sickness, but it can have a few side effects, like making your hands and feet tingle, making you pee a lot and making you feel sick. The second time I climbed, I decided not to take Diamox. But on day 3, I lost my appetite and my oxygen levels were low, so my guide advised me to take it. Reluctantly I did, and I started to feel better straight away. And even though I was ten years older than I was on my first trek, it was easier, maybe not on the old knees, but on the rest of my body. I could eat again, I felt less nausea and my oxygen levels stabilised. Take the Diamox if you can, but test it out before you start your trek.22. Take Packing Cubes to Keep Organised
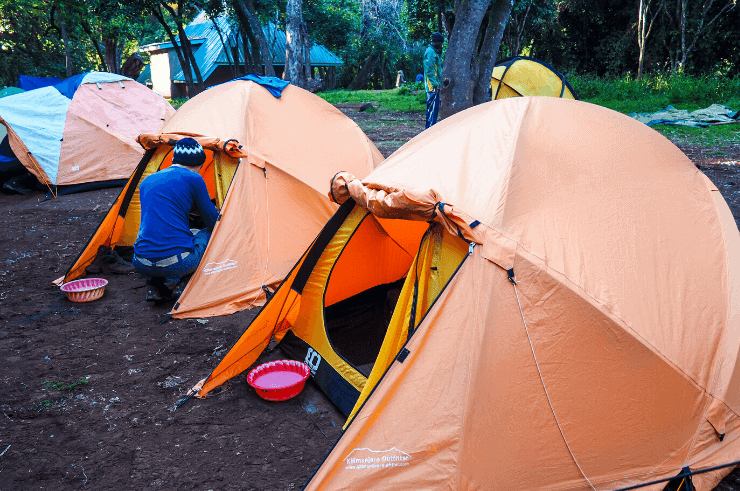
Unless you go on a solo trek, you’ll likely be sharing a tent with another climber, so you’ll need to keep your stuff tidy and organised. I find that packing cubes and ziplock bags make things a lot easier. Have one bag for clothes, one for underwear, one for your First Aid Kit & Toiletries etc. Then you can find what you need easily and stop your tent from being a disaster zone.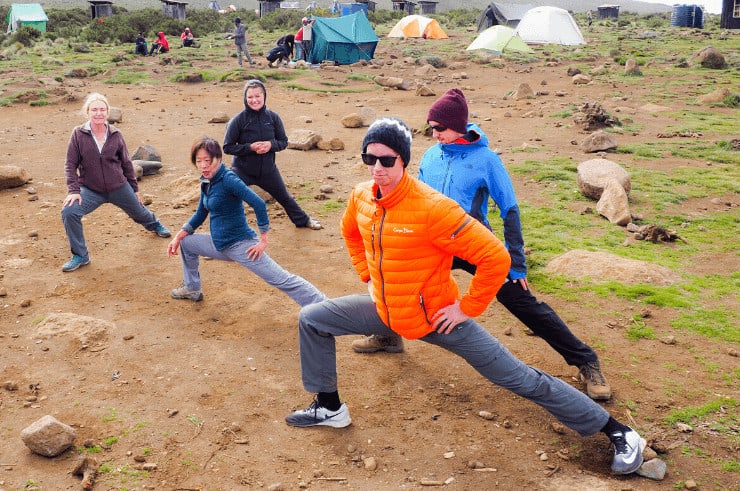
23. Do Some Yoga
At the end of each day, do some yoga or a little light stretching. It will help you mentally and help stop your muscles from seizing up. Just don’t overdo it, especially if you’re not used to it. Remember you’re at altitude!24. Try to Eat
You need to keep your energy up when climbing Kili and the food is usually great but it can be difficult as the altitude sickness creeps in. Most trekking companies will make things like cereal, porridge, toast, tea, coffee, and hot chocolate for breakfast. Either a packed or cooked lunch and then for dinner it’s usually a snack like popcorn and hot drinks, followed by soup and a main meal (we even had lasagne and pizza on our trek). If you start to lose your appetite, try taking Diamox (if not taking already). Also, following on from my earlier point, having your favourite snacks on hand also really helps as you can usually force down some chocolate or an energy bar. Something is better than nothing. And I’d suggest taking some vitamins with you too. Either a multi-vitamin, or maybe even Vitamin C and Zinc just to keep your immunity high.25. Protect Your Eyes, Face, Neck, and Arms
Even though it may be cold on Kili at times, it’s also often sunny and, at altitude the sun is even stronger, so it’s easy to get burned or worse, sunstroke. Trekking with sunburn is awful and you don’t want something like that to stop you getting to the top. Make sure you have high factor sunscreen, at least SPF 50, a good sunscreen/chap stick for your lips, a wide-brimmed hat, and at least a couple of light-weight, long-sleeved tops to cover your arms. Make sure you have a good pair of sunglasses (preferably polarized) to help protect your eyes from the sun, especially if it’s snowy.26. What to Carry with You Day to Day (or in your daypack)
My daypack essentials include:- Water
- Poncho
- Gaiters/Waterproof Pants (if likely to rain – do not let your clothes get wet)
- Hat
- Blister Plasters & Small First Aid Kit
- Snacks
- Phone
- Headphones
- Sunglasses
- Walking Poles
- Camera
- Head Torch/Whistle (I always carry these, in the unlikely event I got lost, I could signal for attention)

27. Keep Yourself Warm
Stay warm by having good clothing (see my packing list) and using a good sleeping bag. From day two onwards you’re above the clouds and it’s really cold at night. Make sure you have a super warm 3 or 4 season sleeping bag. I also love my fleece sleeping bag liner. I would also suggest taking a little hot water bottle if you can fit it in, or if not, you can always use your Camelbak. To sleep in, I wore a pair of fleecy pyjamas and fleecy Heat Holders socks to sleep in – I didn’t wear these to trek in and I’d only put them on once I’d washed my feet. I always sleep with the clothes I want to wear the next day inside my sleeping bag and my down jacket. This helps to keep me warm, whilst also warming up the clothes so they’re not cold when I go to put them on.28. Get a Good Night’s Sleep
Keeping warm is the most important thing, so follow my advice above. It can also be loud in camp as the porters (from your group and others) will still be pottering around camp, cleaning and preparing long after you’ve gone to bed and they’ll be up at least an hour before you. If you have trouble sleeping with noise, I’d suggest taking earplugs and an eye mask (especially good on summit night when you have to sleep in the afternoon). I also use lavender oil (just sprinkle some on your sleeping bag near your head) and I take magnesium tablets (which help promote sleep). I use one of my Packing Cubes as a pillow and the hood of my fleece liner goes over it which makes it nice and cosy.29. Sleep with Your Electronics
Cold temperatures can drain batteries, so I always sleep with my batteries inside my sleeping bag. Usually, I’d put them in the pocket of my down jacket and then stuff that inside my sleeping bag, which also helps to keep me warm. Whilst hiking, I kept my camera in the pocket of my down jacket, and on summit night, I kept it on the inside of my jacket, close to my chest. This brings me to my next point.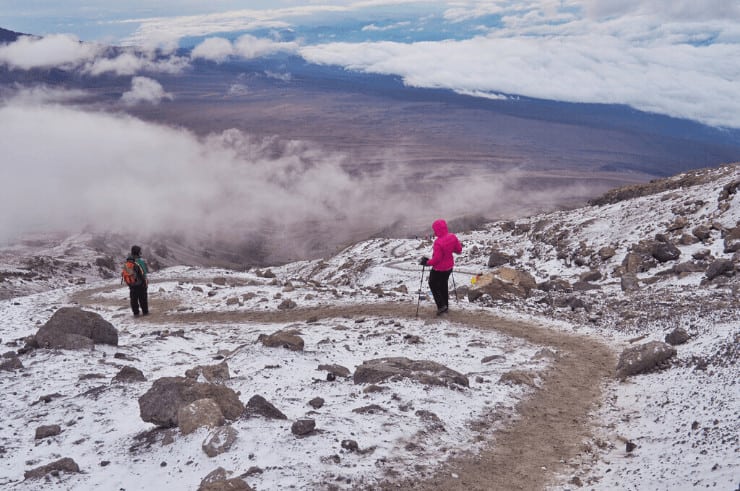
30. Don’t Take a Big Camera
Unless you are a professional photographer, I’d advise taking a small camera. Remember that you’re going to have to carry it and keep it warm, so smaller cameras are better. I have a Canon Powershot G7 Mark II which was great for Kili.31. Don’t Be Scared to Go to the Toilet
This is a big one for some people. Inevitably, you’re going to need to pee outside at some point on your trek. And that usually involves going behind a rock or a bush. Don’t be embarrassed. You will see people pulling up their pants all over the place. No-one cares. Just try and find a quiet spot, squat low and wide, and go. From a distance, you can’t see anything and even someone close can’t see much unless they really look. Whatever you do, do not drink less because you don’t want to pee. The same goes for pooing. Do not hold it in. If you are worried, go on a trek that includes a private toilet for your group. When you arrive at camp, the porters will have set it up and you can poo in peace. When I was on my trek, we would make a joke of it. That helped us all cope. Whoever was going to the toilet would say something like “mission accomplished” or “just dropped the kids off at the pool”. Gross but funny.32. Plait Your Hair & Leave It (if you can)
I washed my hair on the morning of day 1 before I left the hotel and didn’t touch it for the rest of the trip. I’m lucky that my hair is long and it’s not very greasy, so it was still looking ok by the end of the trip. If you’re bothered about what it looks like, you could bring dry shampoo. Again, on the trek, no-one will care, but you may want to look decent for your photos. Wearing a hat also helps.33. Do Not Leave Any Rubbish on the Mountain
I took a few spare bags with me to collect my rubbish. At camp, there will be a trash bag, but when you are walking there is none, so make sure you take everything with you. This includes toilet paper. Don’t just drop it behind the rock. Put it in a small bag and then take it with you to dispose of later at camp.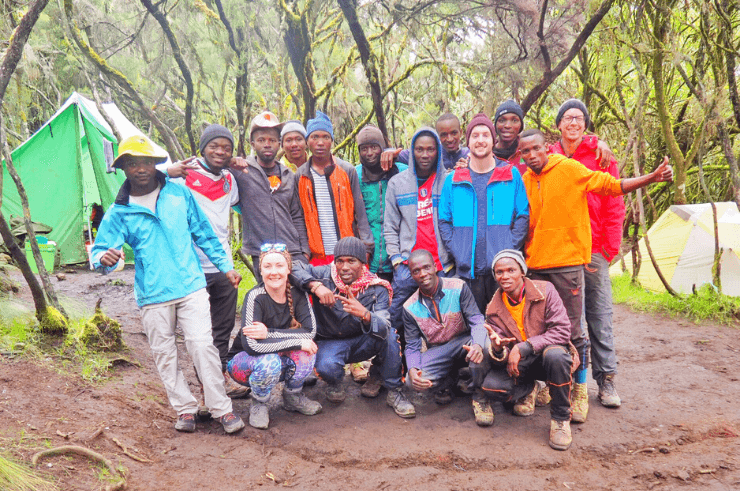
34. Get to Know Your Crew
Your crew will be the make or break of a successful climb. Get to know them, have fun with them and most of all appreciate them. Don’t forget to learn everyone’s names too. This isn’t always easy, especially when you have a big team, but it will also help with the tipping ceremony at the end.35. Listen to Your Guides
Listen to your guide and follow their advice to stay safe and well. Each evening, the guides will usually check your oxygen levels and heart rate. Ours would also make us fill in a little questionnaire about how we were feeling on a scale of 1 – 10. They will do whatever they can to get you to the top but they are in charge and they know best. If they say you need to go down, you go down.36. Want Phone Signal? Follow the Porters & Guides
If you want to find phone signal on the mountain, just look at where your porters and guides are. You’ll often see them, phone in hand, standing around the camp or on a rock somewhere – that’s where you’ll get reception.37. Summit Night Success
Summit night is probably the most important part of your trek. Here are my top tips for that:- Dress warm, but layer and make sure your head torch has enough battery.
- Keep aside a base layer for summit night and wear a fresh pair of super warm socks.
- Take your trekking poles.
- Your guide or one of the porters will usually carry your day bag for you on summit night.
- Don’t forget to pack your sunglasses as it will be daytime when you descend.
- Do whatever you can to keep your feet and hands warm. Heat packs are useful in your gloves.
- Have some tissues in your pocket as your nose will run like crazy.
- Do not wear mascara (I did once – for the photos – but I ended up looking like a panda on all of them).
- Try not to let your water freeze. Start with hot water in your bottles. Blow the water back into the bladder pack. If you can insulate your bottles, better still.
- Take snacks.
- Keep your camera inside your jacket and close to your body.
- Take it easy, there’s no rush. Pole pole. Take breaks when you need them.
After Your Trek
38. Sign Out and Grab a Beer
When you reach the bottom, you’ll sign out from the mountain and there’s also a kiosk where you can buy a beer. Don’t forget to buy your guide(s) one too!39. Treat Yourself
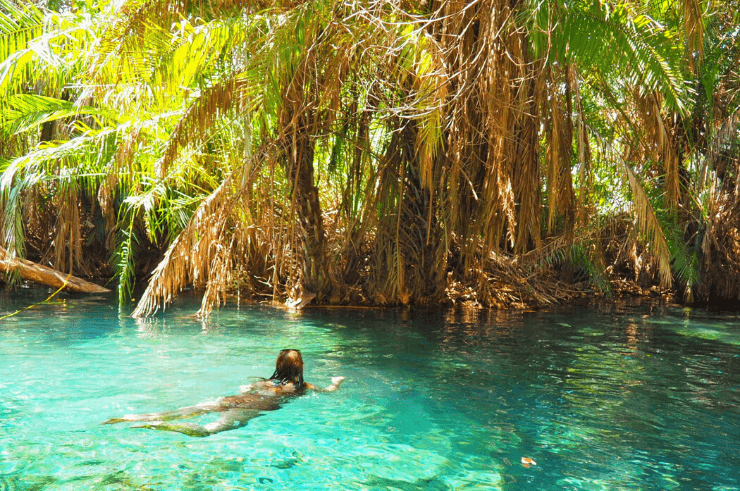
Now is the time to spoil yourself, you deserve it! Maybe treat yourself to a beer, a massive pizza, a massage or a little trip to the local hot springs. And enjoy your first shower (there’s nothing like it) and your toilet! READ MORE: 24 Fun Things To Do In Moshi, Tanzania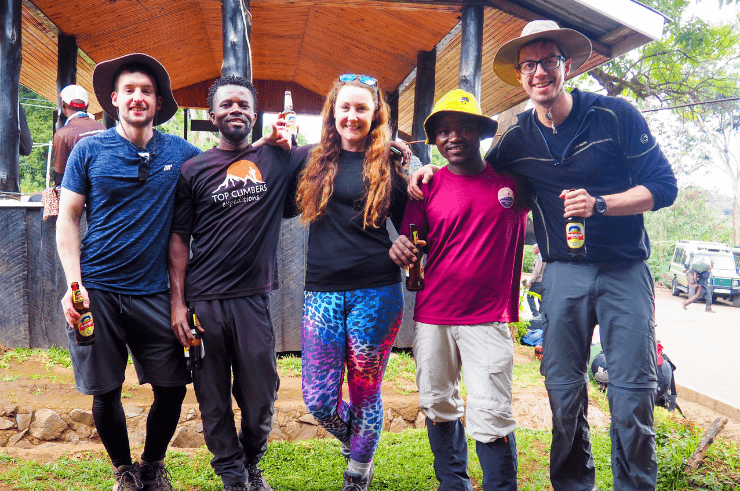
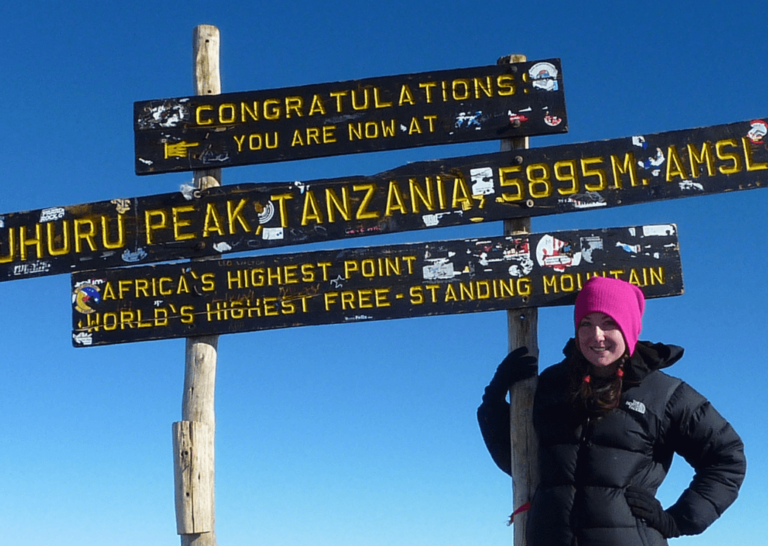
40. Remember the Feeling
You’re probably going to be feeling amazing after your Kili trek, both physically and mentally. Yes, you’ll be tired, but there’s nothing like being disconnected from the world and in nature whilst accomplishing something amazing. Take out your phone and leave yourself a voice note. A voice note of gratitude and appreciation for the amazing thing you have just achieved. Then any time you feel down or unmotivated, give it a listen – you will be mentally transported back to that amazing feeling!Last updated on February 19th, 2025 at 11:04 am
Now go conquer that mountain!!!!! And don’t forget to let me know how it goes!

Awesome post! This is something I’d love to do one day, so I’ve pinned this for when that day comes 🙂
Thanks Rebecca! You have to climb Kili, it’s such an amazing experience! Hard, but amazing! 🙂 Good luck for when you do do it!
I’m considering hiking Kilimanjaro. What training should I do?
Hey,
The best thing you can do is hike, a lot! You don’t have to be super fit, but having a basic level of fitness is necessary. It’s good to get your leg muscles strong, so find your nearest mountains and get cracking It’s also good to get your boots really well worn in, as blisters on Kili are a nightmare – I know from experience.
Other than that, general exercises down the gym, weight training or swimming is good to get you in shape.
The rest of the battle is with with your own mind – Kili is mentally challenging and the altitude sickness, you won’t know how your body reacts unless you’ve been at altitude before or have done special training in an altitude chamber (which is around £129 per hour https://www.altitudecentre.com/bookings/mountaineering/). Mt best advice is to take it really slow and drink lots of water.
For the mental challenges, I suggest having letters from home to keep you going and I also found the fact that I was sponsored spurred me on.
Hope that helps.
Really comprehensive post, Helen! To be honest, climbing Kili is not something on my list. I don’t really care much for hiking, and the fear of that altitude sickness would probably keep me at a lower altitude!
Thanks Amanda! It was pretty tough so if you hate hiking, you’ll probably hate this. It’s like a hike on steroids, but it was all worth it in the end! 🙂
Really enjoyed reading your post – thank you so much for such an honest account of your climb! I am in the process of booking to climb Kili towards at the end of June, and this post (along with your Packing List post) has been really helpful. Very impressed you managed to keep smiling through it all – all worthwhile once you make it I’m sure!
Thanks Angela! I’m still not sure how I managed to smile! But looking back it’s the best thing I’ve ever done! 🙂 I reckon it’s like childbirth (not that I have a child, but from what I hear) – painful whilst you’re doing it, but wonderful at the same time and then when you look back on it you forget the pain and remember the wonderful feeling and sense of achievement! 🙂 Good luck, you’ll have an amazing experience I’m sure!! x
Great posting about climb mt kilimanjaro, thank you for sharing
You’re welcome!:)
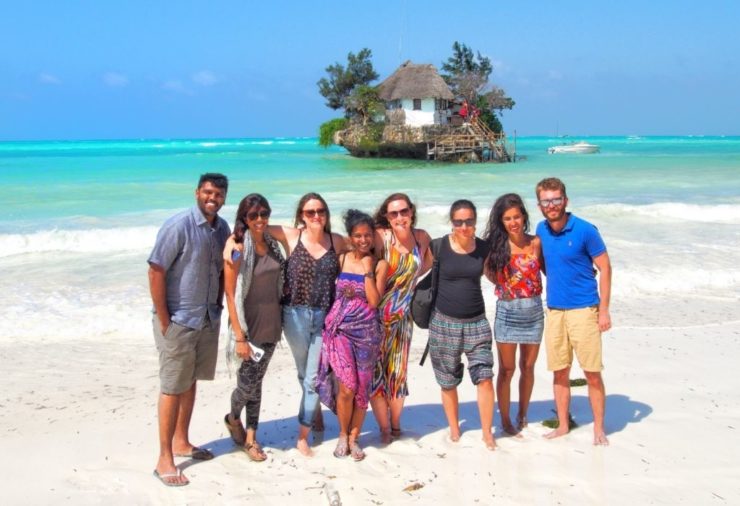
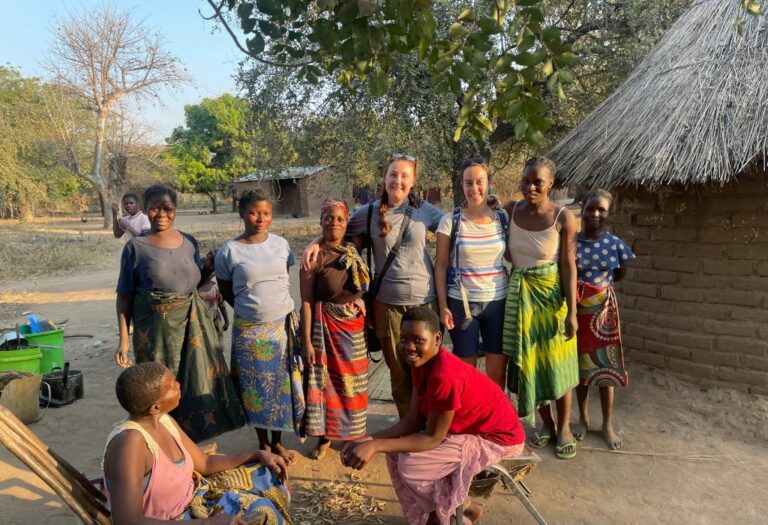
Oh wow! great job Helen! I did it in 2013 , decided one week before and it was one of the best decision in my life and i would do it over again! I have a picture that very much resemble the 4th one on this post. with the bathrooms at the back! LOL
This is a great post. When I went I didn’t know I would have been writing a blog and i didn’t write down most of the information! 🙂 Where I am now planning an overland in africa but I am a bit claustrophobic at the idea of being tight to a group for so many days as I like to move around on my own. do you think it would be doable if I just go to south africa and just find my way around as I go? thanks a lot 🙂
Hi Isabella,
I did this trek 4 years before I started my blog also, however as I climbed alone, I wrote down EVERYTHING because I was so bored! 🙂
Yes it’s definitely doable to navigate South Africa alone. There’s Baz Bus or you could hire a car. Is it just South Africa you are going to? Namibia is a bit tricky with public transport, and Botswana a little but most other places are fine. East Africa is really easy by public transport.
Overlands are very fun though!
ahhah ! No i was not bored , I was ecstatic! and I didn’t write down anything . I was in a contemplative mode LOL but i took a lot of pictures ( which I have lost, but thank god there is fb as some of them are still there 🙂 I was planning to go all over Africa, not only southafrica, hence the question. I know southafrica is easy ..is the rest that worries me.. I will see whether taking the overland or try to go on my own. I have time. Its exciting .. even the planning! thank you so much for your kind reply
It’s only as I was on my own. During the trek i was great, but I didn’t climb in a group (just with a guide and porters) and there was a lot of down time, where I was hanging out by myself in my tent (they were doing their own thing in the evening) and I didn’t take a book. Stupid me!! Especially on the last day as I reached Base Camp a day early, but was too sick to climb that night, so had that night and all the next day to hang around. 🙂 Would love to do it again in a group!
I met some great people on my overland who are my best mates now. But it is also a little bit restrictive in terms of your itinerary. Maybe take a overland from South Africa through Namibia and Botswana, and then hop off at Vic Falls/Livingstone. It’s pretty easy to get around Zambia and then onwards through Malawi, Tanzania, Tanzania, Uganda, Rwanda etc by public transport.
Planning trips is one of my favourite parts! You’ll love it! 🙂
Oh that ‘s an interesting piece of information! very useful. thanks so much! I am excited!
as for kili, yes i understand totally. I was with 3 people, one was my room mate from the voluntary work I was doing and we were like friends for a lifetime. amazing how sometimes you connect with people you just met. and we both connect with the other girl too. I managed to get to the top thanks to them as well. we were encouraging each other and when we reached the top we cried a river. it was so emotional ! I should write my story on my blog. I believe. just the emotional part. I got sick when I got down from uhuru peak. LOL thank you so much for the information. I can’t wait to start my adventure
Hi Helen. There is a masive different of service price we see on internet. Do you know what price is good for safety trip?
As Kilimanjaro is tough I think booking in a reliable operator is a must. Safety should be priority.
Thanks
Hi Hajar,
The prices vary, but Kilimanjaro is expensive, whatever way you look at it. I don’t think you can say this company is better than that company because of price. Getting recommendations from people is your best bet.
But yes I agree, safety should always be a priority when booking a Kilimanjaro trip.
Hi Helen,
Would you recommend booking with Absolute Africa after your experiences? I’m a solo traveler and want to make sure I’m booking with a sound company. I’m hoping to do their combo safari/kili tour.
Thanks!
Hi Erin, did you end up doing this tour? I am interested in doing something similar this year…
This post was such an interesting read!
I was very surprised by the relatively low cost of your trek! Somehow I had imagined it to be like 5k per person or something. And 1 week does not sound too bad either! I used to think this is one of those treks for the superfit, but I am starting to think I might give it a try some day 🙂
hey, I discovered your website today and its absolutely great! Thank you you’ve made my Africa trip a thousand times more interesting.
You are very welcome! 🙂
Hi
We are looking at booking Kilimanjaro, just wondered if you have a recommendations regarding tour companies.
Thanks